92% of people view videos without sound on video-sharing platforms! You might know this if you are doing video marketing.
That is why, as a video creator, you may face a problem in getting your messages delivered without captions to your video.
Also, when you add captions to videos, you may be able to reach a wider audience including deaf or hard-of-hearing viewers and viewers who speak another language.
In YouTube on average, videos with captions see an increase in watch time and engagement compared to videos that don’t have captions.
For this reason, YouTube, and Facebook allow you to add captions while uploading your videos. You can add captions to your old published YouTube videos as well.

You can use any video caption-generating app, but today, I will show you how you can easily add captions to your video in one click on the CreateStudio software while you create your videos in more fun ways.
By the way, you can use any video subtitle generator to do this job. But I am going to use CreateStudio as it allows me to add captions automatically in one click and I can customize the captions as I wish.
If you not using CreateStudio, get it now by clicking here or please read my CreateStudio review. Please note: To use the CreateStudio Magic Captions features you need to be an All Access Member. See all the benefits of the CreateStudio All Access Pass and its pricing.
CreateStudio is an amazing animation software and it should be in your toolkit if you create videos regularly or for clients.
Now, let me show you, how to add captions to your video inside the CreateStudio software.
How to add captions to your video using CresteStudio Software
First, once you open the CreateStudio software you will see this dashboard.
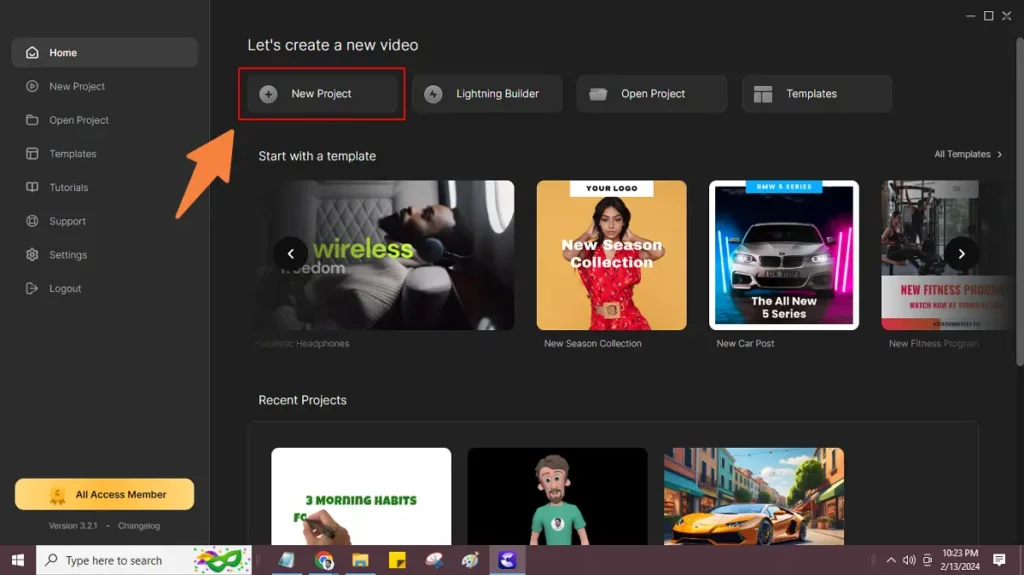
Click the New Project. Next, you will see this blank canvas. Now, save your project.
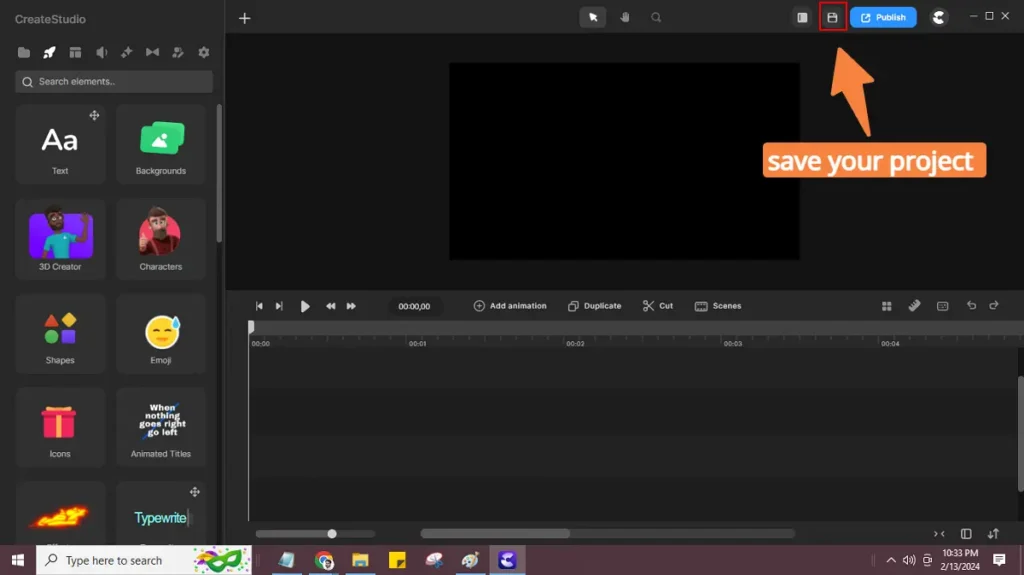
Now, create your video from scratch or upload any old video. For example, I added a scene in the timeline with text to speech audio.
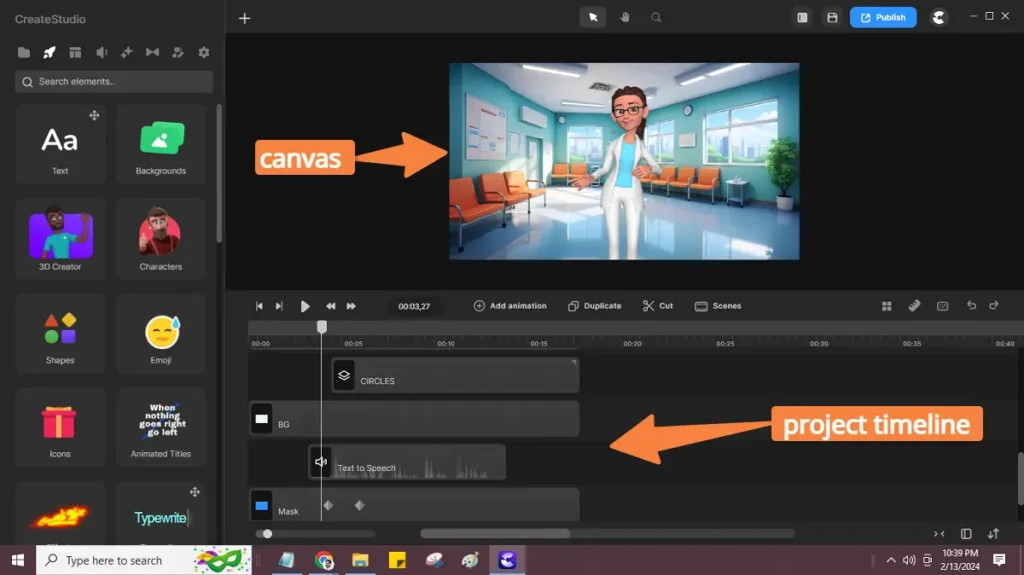
Left-click on the text to speech audio file. Then you will be able to see the Generate Captions option as shown in the below screenshot.
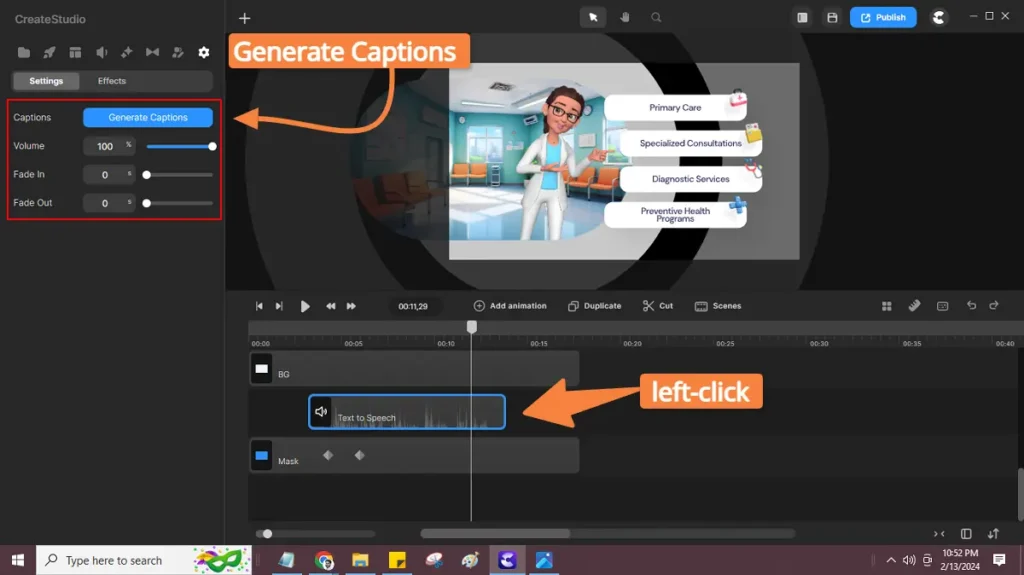
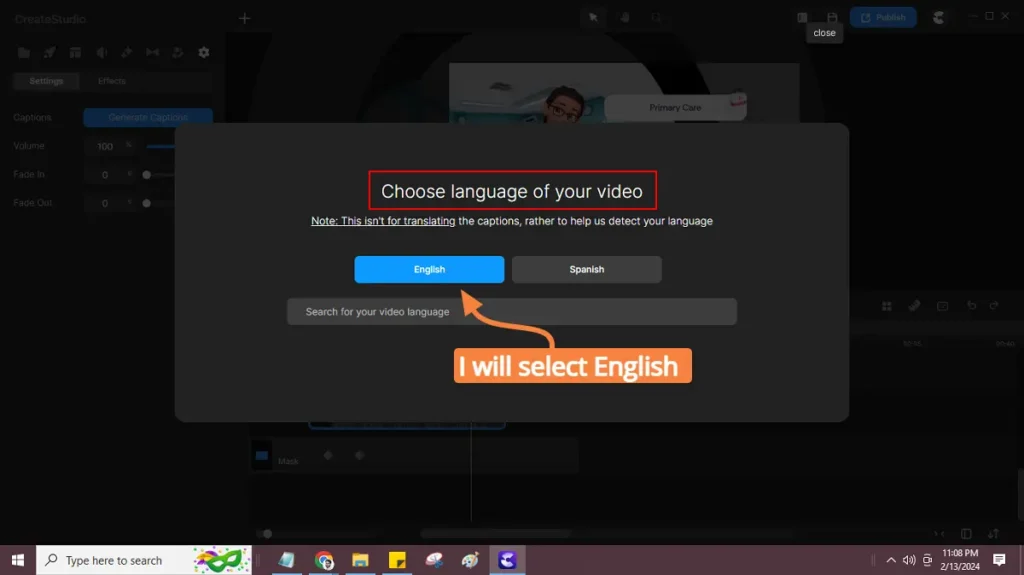
Now, left-click on the Generate Captions. You will get a popup as shown below screenshot after clicking on the Generate Captions option. Here you have to select the audio language (you can search your language) to autogenerate the captions (don’t worry you can customize the captions later).
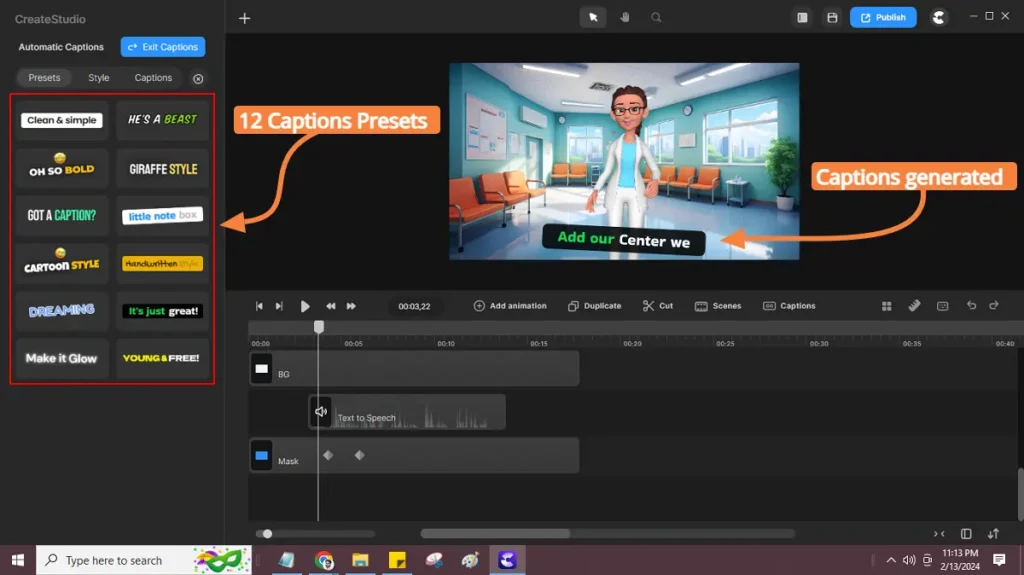
Boom, my video captions have been added to the video. You can see the result below. Also, you can see 12 caption presets available to choose from.
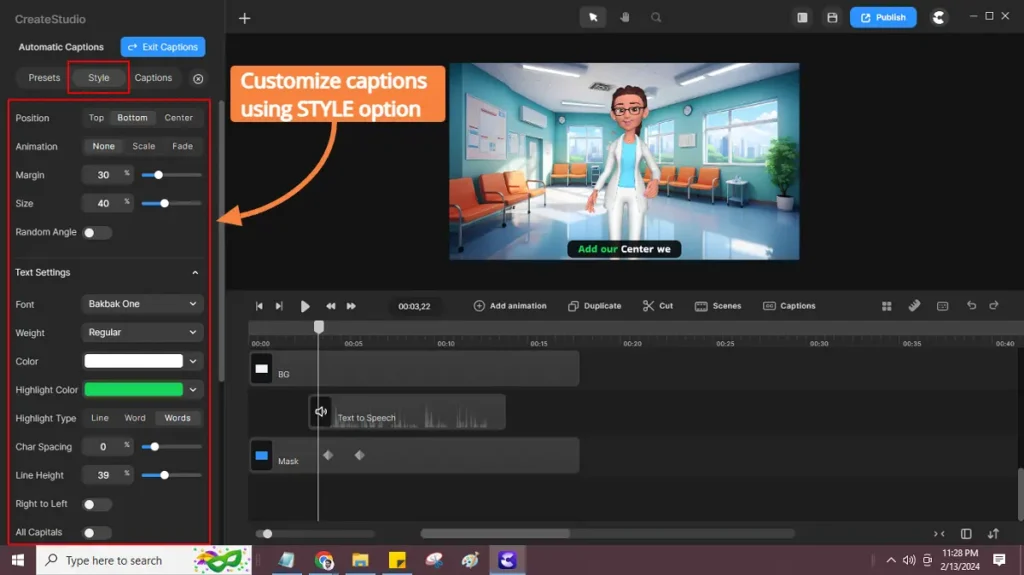
Now to customize caption style like text size, position, text font, text background colour, animation, and so on; you need to select the Style option as shown below. I have changed the text size (default text size 65) & margin (default text margin 34) and turned off the random angel.
Next, we have a captions option where we can modify the text or adjust captions timing if needed. You can also add or delete captions using the plus or delete sign.
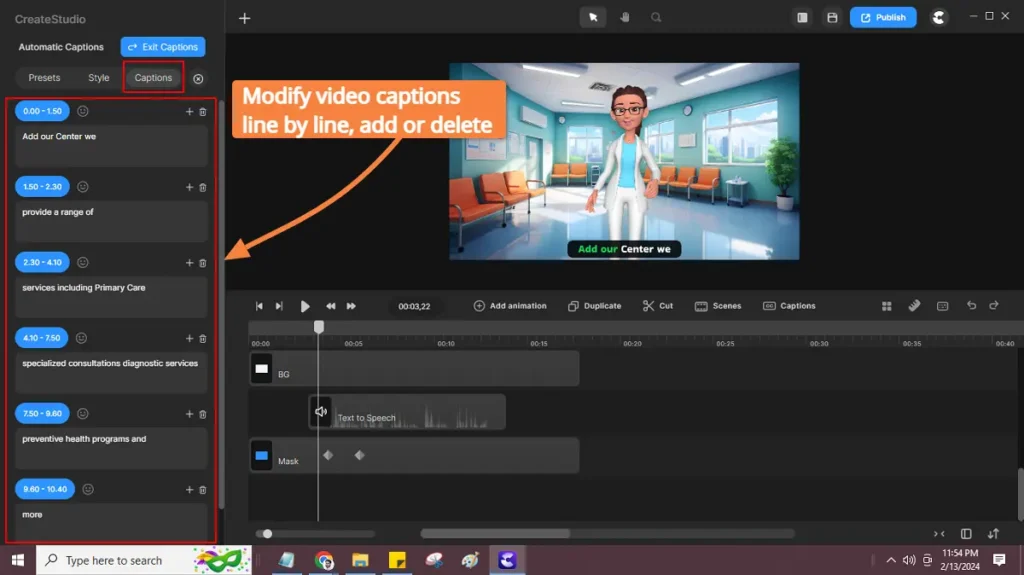
As you can see, how easily you can add captions to your video using the CresteStudio and reach a wider audience.
You can also see my video tutorial…
