You must be thinking that creating explainer videos must be a hectic job, or you must have to be an experienced designer with exceptional design skills or video editing skills to create attention-grabbing cartoon explainer videos.
Well, it’s simply a misconception, the truth is everyone can create beautiful, informative videos. Wondering How? Creating an explainer video is easy with the help of specialized software.
In this post, I am going to guide you in creating explainer videos to ease your online marketing, training, or online promotion.

What is an Explainer Video?
An explainer video is generally a short video with graphics that try to share information and explain different topics, products, and services in an engaging and fun way.
Explainer videos are often explained by the author or the artist following the graphics.
The motion graphics and voiceover text make it easier to understand the topic, which is why the audience finds explainer videos helpful.
Explainer videos are getting extremely popular, especially among online trainers, conference hosts, and YouTubers.
Now, most website owners also use explainer videos on their home page to landing pages to explain the benefits of their service or products to the audience easily.
In my journey as a digital marketer, I have created various explainer videos for my clients and me, you can go through some 3D explainer video examples by clicking here.
And now if you want to learn more about explainer videos like how to create an explainer video, then let me show them to you. Hopefully, you will be able to create your first explainer video after reading this full blog.
4 Steps to Creating an Explainer Video
Now that I have explained to you about the explainer video let’s proceed to see how to create an explainer video.
I always use the following steps to create the explainer video, and I can assure you that if you follow my steps you can create your first explainer video very easily.
-
Start with creating a script
-
Follow it with a voiceover or stock music
-
Create the explainer video
-
An Optional Step – Enhancing the Video
I will explain all these steps separately in this tutorial, but I like to mention the accessories that you need to create an explainer video.
Things that You will require…
I like to take you through the accessories that I use to create explainer videos.
You do not have to use the same accessories, you can choose the ones that work best for you.
Script Writing Tool – I use Microsoft Word, but you can also use Google Docs. It has amazing saving options. Sometimes I use Google Docs too.
Microphone: Any suitable microphone that gives a clear voice recording opportunity. I use a JBL microphone.
Voice Over Recording Software – I use Audacity, as it is free and helps me to save money and get more profit while I do it for my clients. It could be an optional step for you if you use stock music on your explainer video. Sometimes, I also use stock music based on my project.
Explainer Video Software – Renderforest is my go-to for creating explainer videos.
Video Editor Tool (Optional) – I use Filmora video editor for editing my videos, also Movavi is also a great alternative you can also use it too.
Now that I have completed explaining the accessories required to create an explainer video. Let’s move to the main points and look at the way of writing a script for the explainer video.
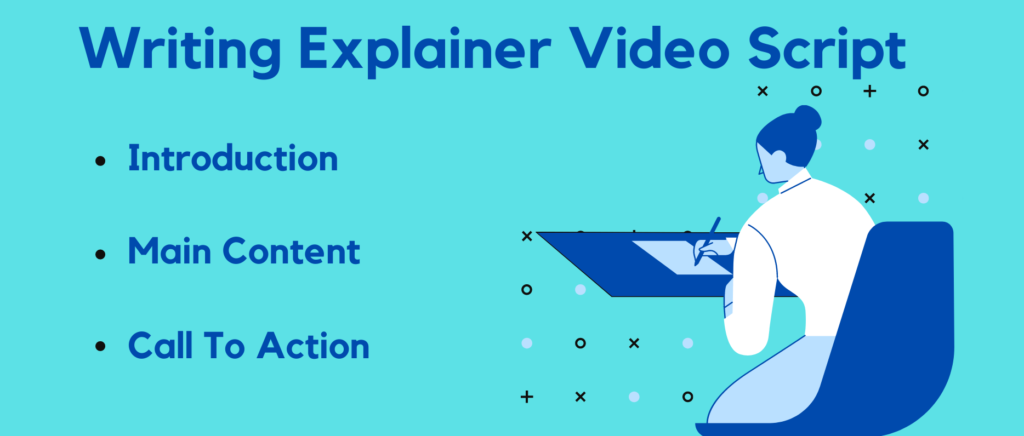
Step 1: Writing Explainer Video Script
The key to a successful explainer video is a well-written script. Choose to write the script in a way that is understandable to everyone.
I prefer to research well before creating a script for my explainer videos. I write the script in short sentences in the following structure…
-
Introduction: I start my script with a brief, catchy, and to-the-point introduction. The introduction helps me to construct the topic or subject of the video for the audience.
-
Body: I describe the main aspect of the content here. For example, let’s say I am doing a product-related explainer video then I speak about the benefits of using the product, or I describe a few hacks. Along with that I also mention disadvantages or how you can avoid certain issues of using the product.
-
Conclusion: The conclusion is a brief recap of my complete content. The conclusion helps the audience to recalculate what they have learned in the video.
Step 2: Voiceover Recording
(If you want to use music then skip this step and read from… Step 3)
Voice-over recording is a very important aspect of video creation. Since video is an audio and visual medium of storytelling, I make sure that the audience can understand my voice and the message clearly. Therefore, I advise you to do the same when you create an explainer video.
Tips to follow while recording the voice-over for your video:
Voice Over Recording Process
I record my video in a quiet room, also my room is small so my voice does not echo. My suggestion is when you are recording your voice for your video make sure to inform others that you are working on a video or close the door and window to avoid repetitions.
First, I clip the script in front of me (It helps me to read the script flawlessly) and then I use my JBL headphones to record the voiceover.
Also, I revised the script several times before making the final recording. It helps me to modify my voice and know where to stop and how to play with my voice.
A Few Important Tips
– Keep your voice normal
– Remember you are speaking with the audience, so go slow
– Make sure your voice is clear
– Do not be scared, feel at ease
– Start the recorder and wait for 3-4 seconds before you start speaking.
– Practice before making the final recording
Editing the Voice Over
So, till now I have never got a voice-over on the first take, so don’t worry if you are making mistakes. No one is perfect so you have to record your voice several times before you give your final approval.
Once I am satisfied with my voice-over, I always give it an edit, to remove the existing background noise and voice flaws.
For voice-over editing I use Audacity. It is a very good software for trimming, joining/merging, cutting, and pasting audio.
Not only that I find Audacity very useful for volume adjustment, stereo-to-mono conversion, fading in and out, sample rate conversion, and format conversion for my audio sections.
Now this section is not mandatory for me, because of my practice and after recording so many voiceovers. Now I can take perfect voice-over in a single attempt.
Once you are done editing, save your voiceover as an MP3 file.
Transferring the Voice Over File
This is an optional step when I use Audacity the file is saved as MP3. So I do not have to convert the file. But if your audio editing software does not allow you to save the file in MP3 format, then you download the file in whatever formats they allow and then convert the file using CloudConvert and make it MP3.
Step 3: Time To Create the Explainer Video
Now it’s time to start creating the explainer video. I find Rederforest very handy. It fulfills all my requirements to create an explainer video. It has a lot of useful templates, I choose the one I like and start creating the video according to my topic.
Start Video Creating Using Renderforest
The first step is to log in to Renderforest with the user ID and password.
With all the necessities and requirements of creating explainer videos explained above, I will finally guide you through the video creation process using Renderforest.
Scenes Selection
Click on the “Scenes” to continue: I select one scene and then add the scenes with a quick reference to my script. Once I finish adding the scenes I click on “Insert” and move on to the next step.
Customize the scenes with the tools on the left: In the Renderforest software, there is a toolbox on the left-hand side. To customize the scenes of my explainer video according to my requirements I added the text from my video script.
Uploading the media files: Depending on the type of explainer videos that I plan to create I upload logos of brands, videos, images, or files from my device. To give the viewers a perfect story using real videos of products and services that I ask my client to provide heightens the authenticity of the explainer video that I create.
Edit Scenes And Export The Final Video
My video creation has already come to the finishing line. I have already the scenes according to my requirements, and now I have to do the rest of my tasks. So, let’s proceed and complete the rest of the video.
Selecting the preferred style, and fonts: Once I am done editing the text, I move on to selecting the style for my video. Renderforest styles include the standard version, texture version, wiggle version, and many other options. The version that looks good on the explainer video I selected in that style. Also If I feel like the fonts are not matching my video I get the perfect fonts.
Adding the perfect color to my video: I can change the colors of my video by selecting the color presets. Also, there is another option named “Custom colors”. By selecting this option you can customize the background color and change the icons.
Inserting music and voiceover: The next step is to add the music or the voiceover that I have prepared for my video. Whether I will add the voice or a particular one depends on my script. Therefore, you get the opportunity to use both options for your video.
“Preview” section and see the final video: Now my explainer video is almost ready, For finalization, I preview the video to check whether the scenes match with the voice-over or the music is aligned with the scenes. I believe previewing the video is a very essential step in video creation.
Finally, let’s download the explainer video: I have already completed all the required tasks, and finally, it’s time to download the explainer video that I have created using Renderforest. I usually download my explainer videos in SD360 quality for free for testing purposes and are associated with a watermark. Next when I feel all looks good I down the HD780p or HD1080p video downloading versions. But if you are planning to download the best quality explainer videos that will look professional then will have to upgrade your Renderforest account.
Hurray! You have completed the video creation journey with me. I hope now you have come to know that creating videos using user-friendly software is not that tough.
You must have already understood every detail in this post. But now it is time to enhance your video, I will surely encourage you to use Filmora video editor or Movavi to enhance your explainer videos
Step 4: Enhancing the Video
Enhancing the explainer video is an optional yet important step in video editing. Enhancing a video can allow you to improve the looks and feel of your video and make it a lot more professional. The more appealing the appearance is the more chance viewers will like your videos.
So, here is what I do to enhance my explainer videos. As mentioned above I use software like Filmora video editor to enhance my videos. Here is how I use Filmora to enhance my videos:
An enhanced video is best for YouTube channels, landing pages, informative blogs, social media posts, and so on. As well as you can monetize your video creation skills by starting a video production company of your own to make money online.
Wrapping up
So, now that you know about the complete process of creating an explainer video. Also, I guess you understood that creating an explainer video is not a tough job and you don’t need to have design skills.
Now, it’s your turn, go and create your first explainer video on Renderforest.
Explainer Videos not only create new insights for your viewers but also drive success.
Do comment below to let me know about your experience of creating your first explainer videos using Renderforest. Also, acknowledge me about the hacks that you follow to create your video.
